
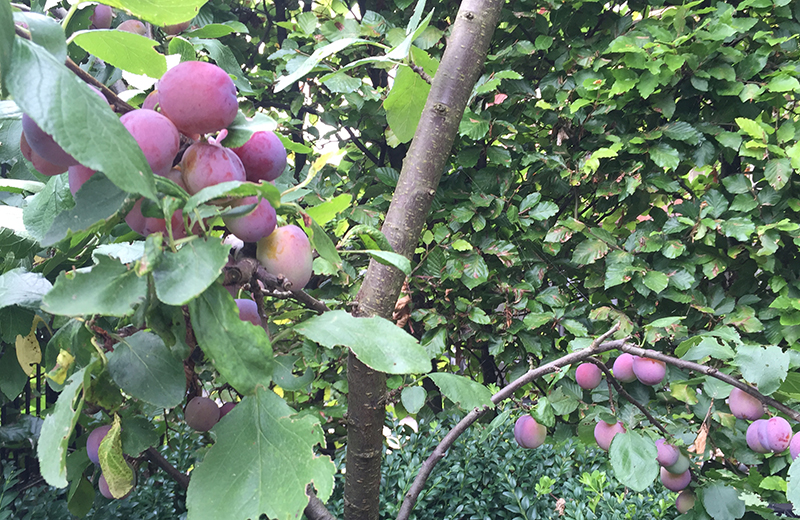
Our little plum tree, after the first plums had been picked.
Summer is such a great time to be outdoors and watch the plums ripen.
Which is exactly what I did for about two months – apart from trying to get my allotment strawberries out from between loads of weeds (well, grass actually. But not the nice stay-in-one-place grass you get in lawns. The other, ambitious, conquer-the world kind. My mistake).
And one day a plum was lying on the terrace. Ripe as anything. Plum harvest time!
Two years ago we spent like three weeks eating plums for dessert just to keep up – with a tree just two years old.This time it was going to be, well, worse. The plums were growing in bunches like grapes. Branches were bending down under the weight. One young branch half tore off under the strain. It was ridiculous!

I was a bit better prepared this year, and I soon realized that baking a pie wasn’t going to help much. So that meant… making plum jam! I’d been reading about it so I was… almost ready for it. Last weekend I did the first batch.
Making plum jam: preparations
- Get some jellification product and some form of sweetener. Because I was just getting started I opted for sugar with added pectin (Van Gilse speciaal) for ‘semi-sweet’ jam in stead of the standard very sweet recipe (a kilogram of sugar for every kilogram of fruit, yikes). Getting the two as separate products means you can modify the recipe to suit your own taste, but I decided to take the easy option this time and see where that got me before experimenting.
- Get jars to hopefully put the jam in! I bought some 230 milliliter jars and some 370 ml jars.
- Plus, a funnel with a wide opening that can stand on top of a jar.
 Not strictly necessary: a kiwi spoon. Because I didn’t feel like pulling stones out with my fingers, far too messy; a knife can create a mess too if you’re not used to this kind of thing, and the ‘plum stone remover’ costs too much for a couple of kilograms. I’ll put that one on my wish list for next year though – never know what to ask anyway, so hurray! One item on the wish list. With a birthday in May I’ll know by then if I’ll need it in July. The tree may decide to have a rest after this year’s harvest.
- A large soup ladle or a jug, anything to scoop your jam into the jars that’s smaller than the actual pan.
- Put the whole lot into the dishwasher: jars, lids, funnel, everything you’ll use after preparing the plums, about an hour before getting started. Including the soup ladle. When it’s done, check that all the water can leak away or evaporate properly before you add your precious plum jam.
- Also, I got an old dishcloth, folding it up so a row of jars would fit on top. With yellow plums it’s probably not a big deal if things get a bit messy but I have the other kind…
- Finally, I put a couple of small plates into the fridge to cool, for testing the jam.

Preparing the fruit
- Wash your plums.
- I’ve found it easiest (this is after round two, by the way) to first remove the stones and any plums or parts of plums that aren’t up to scratch.
- Then weigh the whole lot to see how much you’re left with so you have some idea of the amount of jellifying product you’ll need. In my case, I started with about 1100 grams of fruit; after cleaning, this was 900 grams.
- Cut the plums into pieces of a size you like. Mind the plum skins – you don’t want them to end up too big, unless you plan to remove them later. They do add wonderful color to your jam, so they’re worth keeping.
- Put your fruit into the pan. I used a pasta pan, nice and high so your plums don’t boil over making a frightful mess. In my case I needed to add 360 grams of ‘geleisuiker’ (40 grams per 100 grams of fruit). Stir and keep stirring. You’ll end up with a cold sweet plum ‘soup’.
- If your fridge is too far to be able to reach in a matter of seconds, get the plates out. Otherwise, leave them in until your jam is nearly boiling.
At this point, warn any kids about the house to stay out of the kitchen from this moment onwards until you tell them otherwise! Hot jam alert.
Keep stirring, keep stirring
- Then, carefully get your plum soup up to boiling point. Keep stirring – don’t leave the pan alone. There’s sugar in there and you don’t want it to burn. Keep stirring. This may take some time, so enjoy – especially dark plum skins go all the way back from bluish to red to nearly colorless, while the jam mixture gets a richer, deeper color almost by the minute.
- When it starts to boil, keep stirring until it boils while you stir.
- If you have pieces of plum in there: now boil for about 4 minutes: about 1 kilogram left to put in jars. Don’t forget to keep stirring!
- After 3 to 4 minutes, sprinkle a bit of your jam on one of the plates. If it stays runny, your jam is not yet ready. Wait a bit (keep stirring) and try again. Pull your finger over the droplets to test (and taste). Soup or jelly? I set my timer to 4 minutes which was about right.
- Fill up your jars! Go as close to the rim as you’re comfortable with, without getting jam on the rim (jam between jar and lid means the jam won’t keep as long). If you spill some and you notice in time, it’s probably easiest to just tip the jam back, stir it in with the rest, reheat a bit, and use another, clean jar.
- Put a lid on every jar immediately and put the jar upside down. In my case, I used the timer which was set to 4 minutes again to have some idea of time passed while I filled up the next few jars. I ended up with 3 small jars of jam, 1 big jar, and an empty pan.
- Turn each jar right side up after at least five minutes upside down, and leave to cool.

You’re done! Apart from cleaning up, warning the kids that the jars are still hot, and – don’t forget – scraping the residue out of the pan into a bowl to cool so you can enjoy the fruits of your labor just half an hour later – instead of having to wait until you can open one of your jam jars. In my case, with a very empty pan, I licked the jelly off my fingers while watching TV after my second round of jam-making.
Plumburst – ripe plums don’t grow well
 Well, I call it ‘plumburst’ anyway. It’s what happens when your plums are still on the tree, ripening, nearly ready… and then it starts to rain heavily. I’ve read about it in grapes, but plums get this too. My guess is that so much water is sucked up by the plant that the plum skins, that are no longer as flexible as before, can’t keep up with the sudden increase in size of the plum within.
They start to show thin lines – call them ‘stretch marks’… and then the plum tears open, not into pieces, but with a skin that’s open near the top of the plum, sometimes torn apart so far you can see the stone. If left this way they’ll rot very quickly.
This happened last Wednesday – the very day I’d opened the first jar of homemade plum jam, and fortunately I was at home that day so I checked the plums and noticed what might have cost me part of the harvest. I picked any fruits that had burst or looked as if they would and turned them into jam that night. Whether I’ve managed to rescue their taste remains to be seen. I left a few that didn’t look too good in the garden for the snails, woodlice, ants, and possibly wasps.
My first plum jam breakfast. Half of it anyway, because – look at the color! I had to have another one.
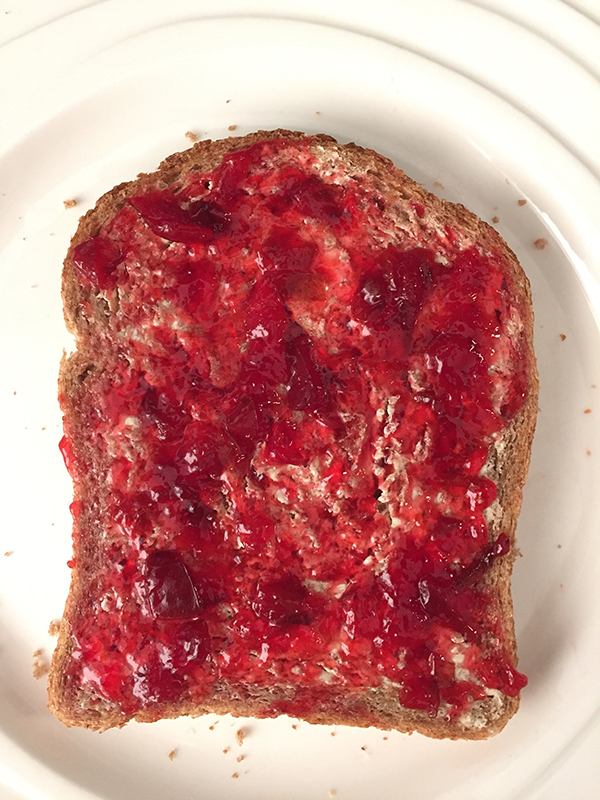
In short: it wasn’t as messy as I’d thought and well worth the while.
That was my week! How was yours? Harvesting, baking, curling up with a book, or still watching your plums ripen?


Hmm, I shall try to grow this fruit. Does it require seasons? Such as Winter, I mean. Because my home is on an island.
Do plum trees require seasons? Interesting question. I’ve no idea. I know apples need some sort of winter as in ‘colder temperatures’. Plums may not mind as much since they’re related to apricots, which don’t give a reliable harvest in our cool(ish) climate. They do however ‘hibernate’, dropping their leaves in autumn. That is of course a matter of self-protection against frost, but more plants do the same without requiring very low temperatures in order to bear fruit. Worth checking before buying a tree. However, if plum trees are available in local garden centers (you can check them out online) I would not expect problems. If plums don’t work out where you live, perhaps apricots will be more successful.